By John Stephen
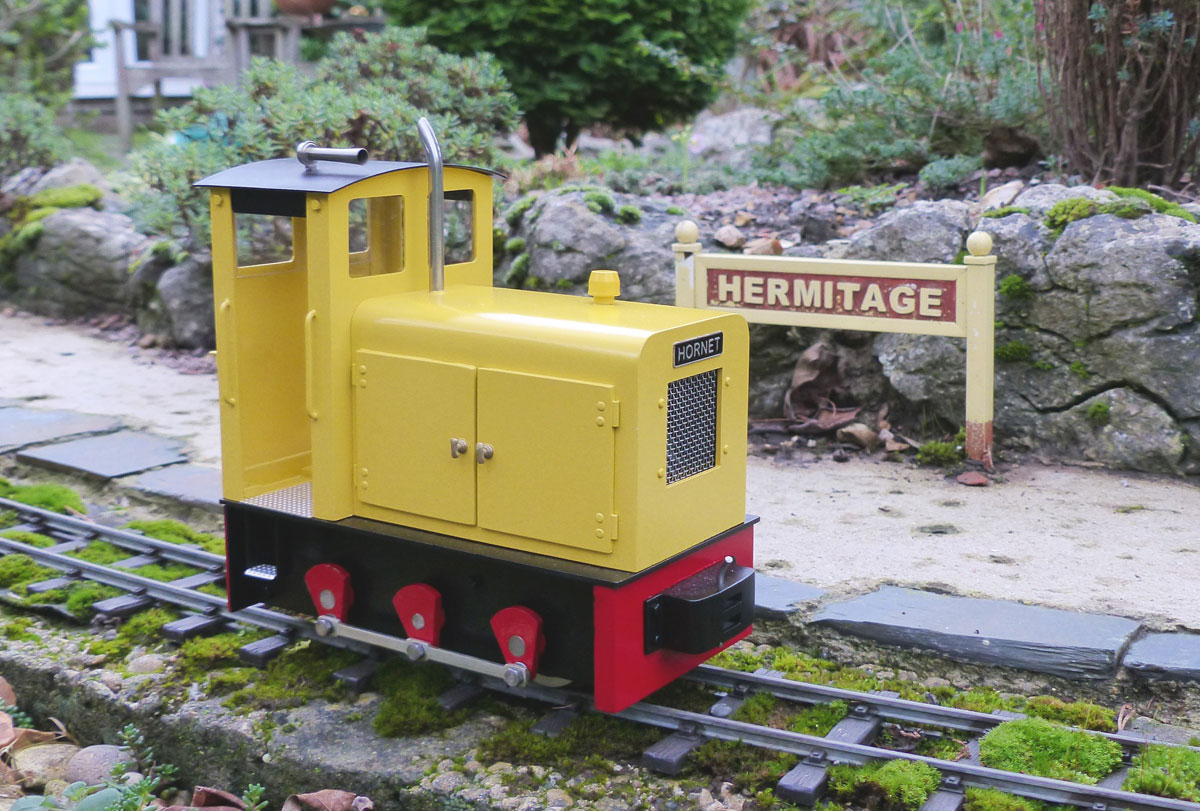
In early 2015 I was looking for something simple to build as practice for the skills needed to attempt a bigger project I had in mind. Searching the internet I came across a German narrow gauge loco that looked interesting; it had a simple body shape plus a jack shaft,cranks and connecting rods.
A combination of visible moving parts and a bright colour would, I thought, be something interesting to watch as it ambled around the garden layout. Building an exhibition piece was never the objective, it was to be a ‘best I can do’ standard beginner’s model that turned out better than expected, or maybe it is just an excellent example of the covering power of a thick coat of paint.
The Design
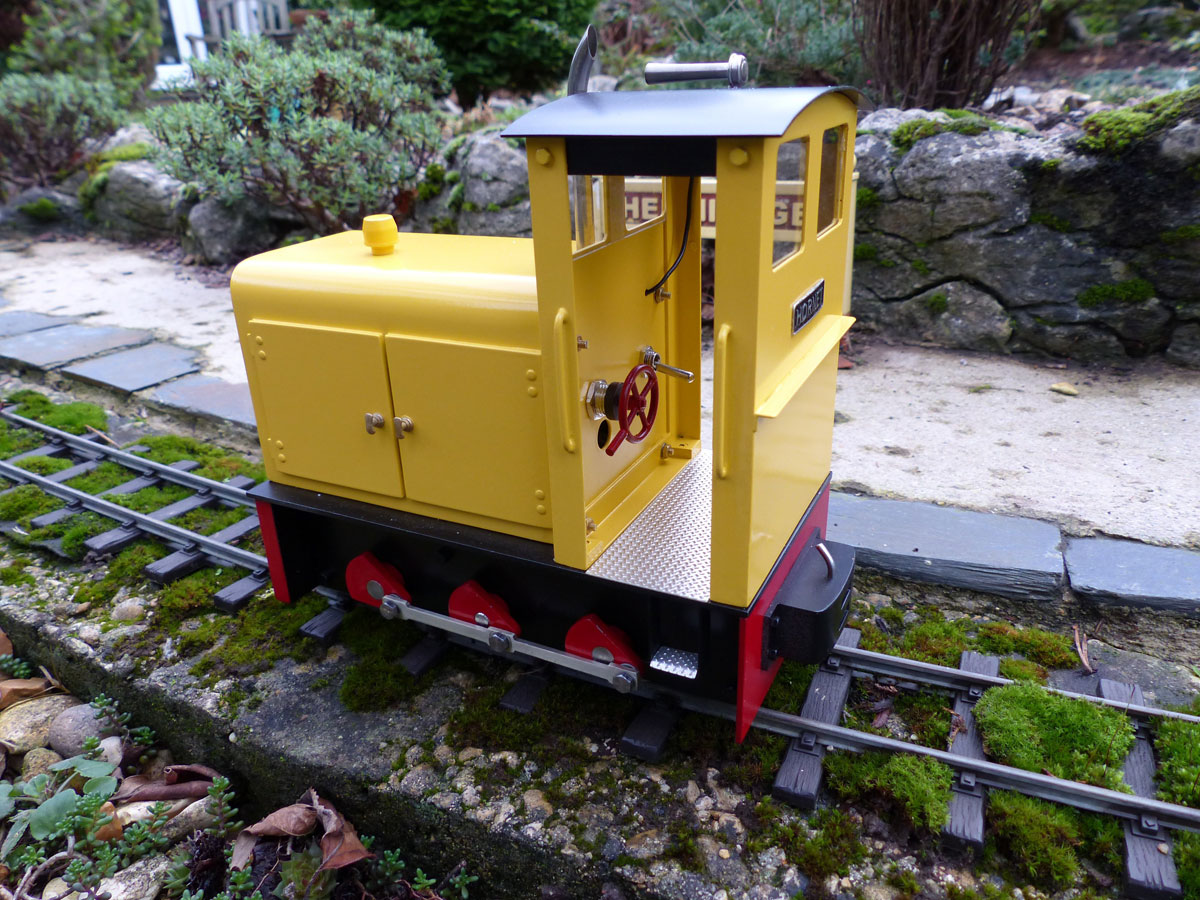
A cab view
Proportions can make the difference between ugly and elegant: a difference that might be very small. When estimating the dimensions from pictures of the real loco they were adjusted on the drawings to make the proportions look about right. For this reason the cab length is about one third of the length of the body, while the bonnet is about two thirds the height of the cab.
Windows are in pairs rather than one big one – that would look lonely – and the radiator grill has the same proportions as one window. It may be lonely out there on the front, but that’s life and it does have a name plate to keep it company. The cab rear looked a little plain at first until the angle bar was added; it should possibly have been a little higher to provide reinforcement for the windows, but where it is again looked about right.
Chassis Construction
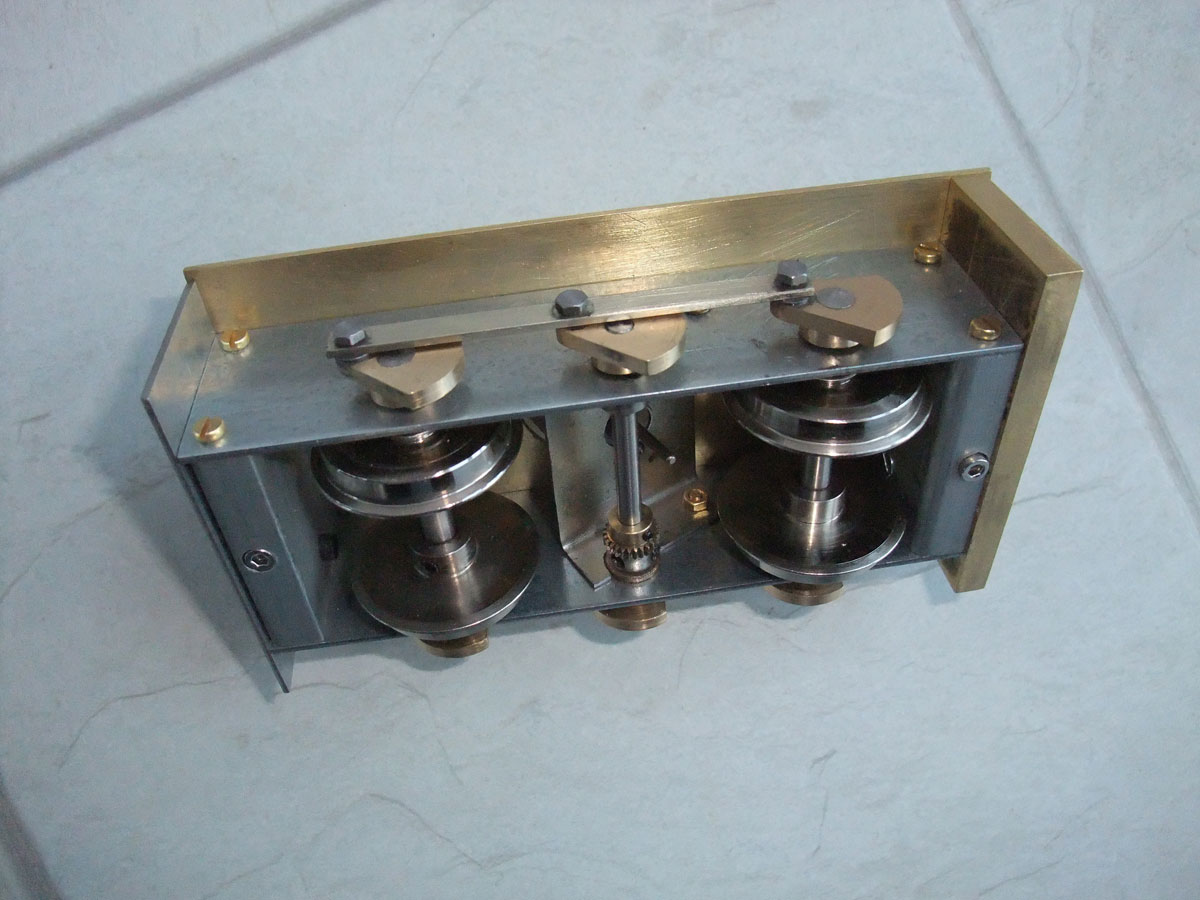
The assembled chassis, worm drive disengaged
The chassis sides and rear buffer bar are constructed from zinc plated steel strip,with spacers made out of a scrap zinc lump to add some useful weight. The weighted front buffer bar is made of 6mm brass and the top plate from 1.5mm brass. Templates were made to accurately place the axle and connecting rod holes and shape the turned brass discs for the cranks.
Reinventing the wheel seemed pointless so the wheels, bearings and crank pins were all purchased from Roundhouse Engineering.
The drive train presented me with a problem at, first having no idea what size of motor was required or what the gear train or the gear ratio should be. After a lot of consideration I settled on a MFA/Como motor and a worm drive with a 27 to 1 ratio, giving a maximum scale speed of about 25mph.
Bodywork
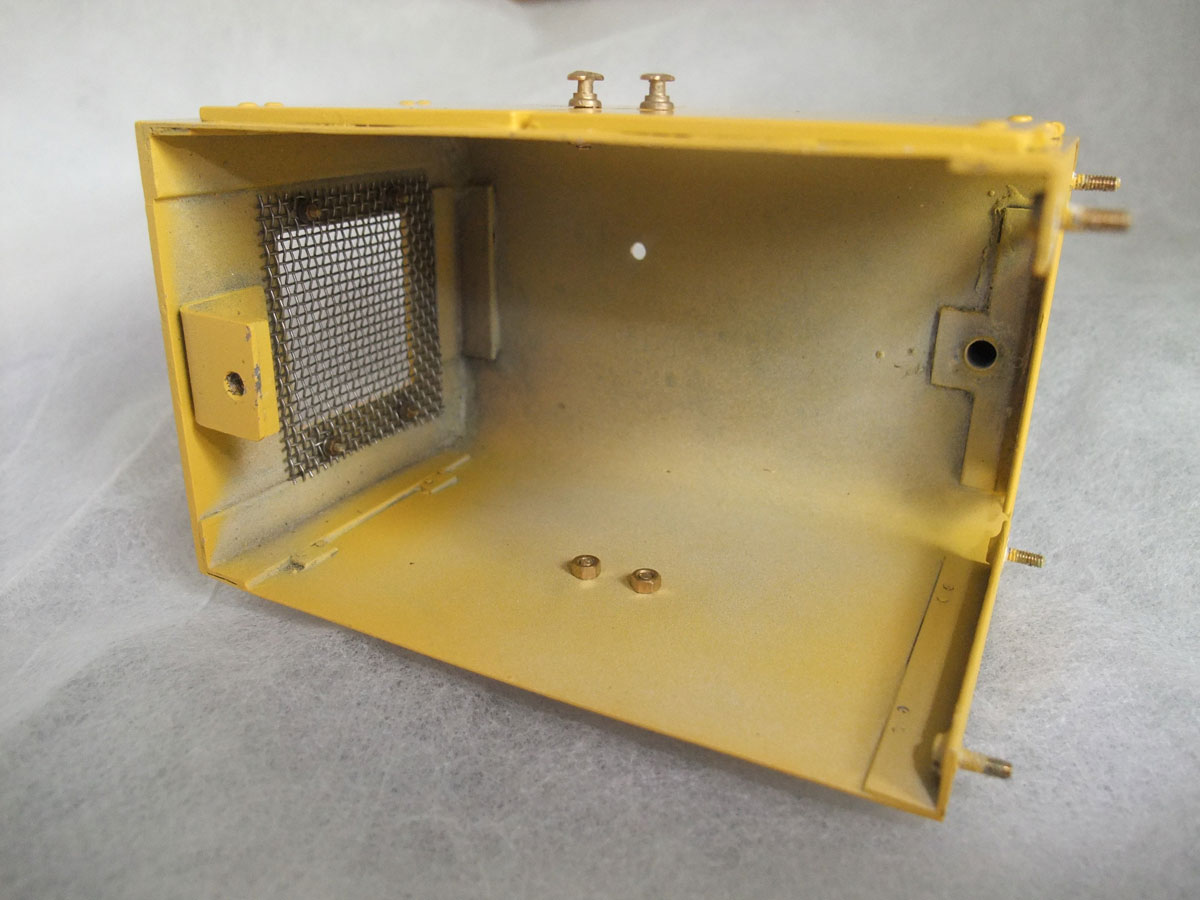
The inside of the bonnet, with paint over-spray!
The bodywork is very simple and made entirely from sheet brass and 8mm brass angle. Probably the easiest part of the entire project was the cab, both the front and rear being identical. Windows were cut with a piercing saw and pieces of angle soldered to form the sides of the cab. Angle soldered to the bottom edge has pads drilled and tapped M2.5 to fasten the cab to the chassis top plate.
The slot couplings were fabricated from short brass strips soldered together and filed to shape while the klaxon and air filter are of turned brass and the exhaust pipe is thin walled brass tube bent at 45 deg.
Chequer plate for the cab floor and steps came from ‘Swift Sixteen’ and together with the exhaust Klaxon and air filter were tin plated using a solution of tin plating crystals. This is the first time I have used tin plating, it is easy to do and as well as looking a little like chrome plate, it takes paint very well with no special primer required.
Finishing
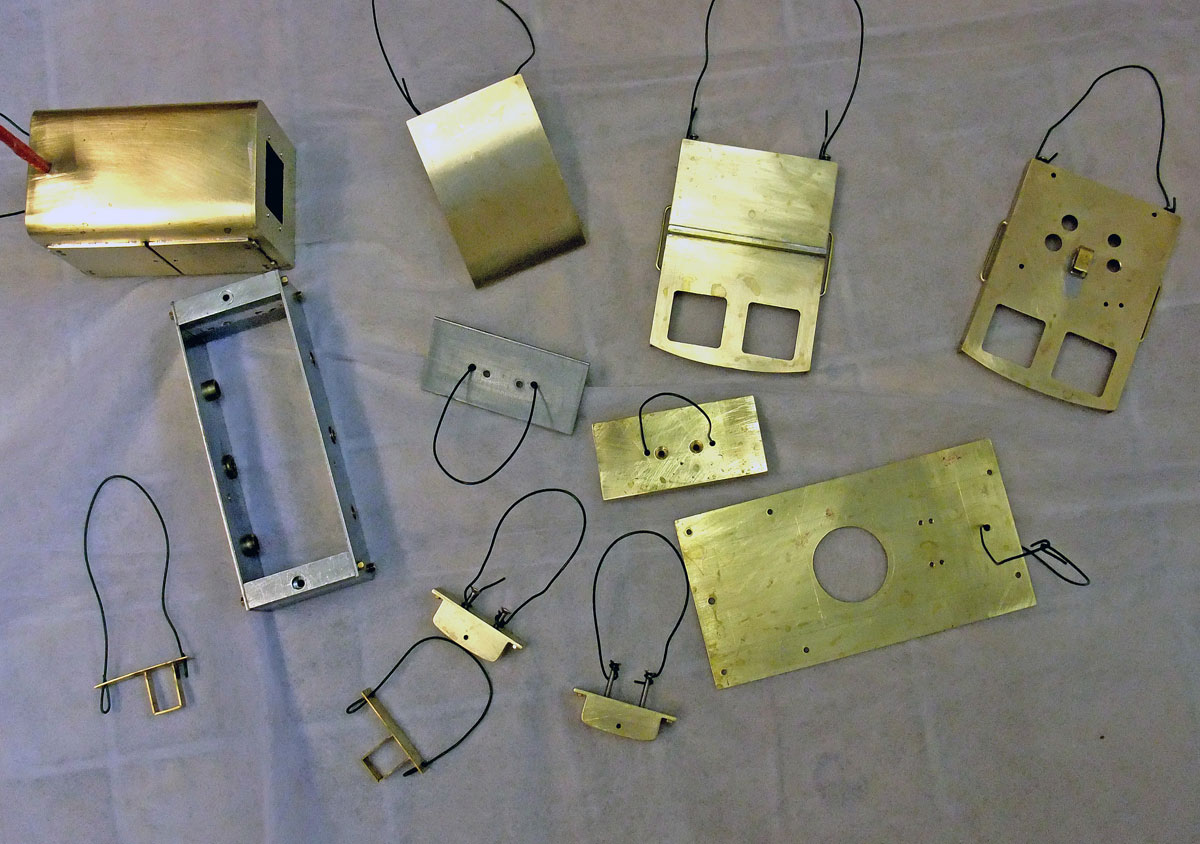
All the main parts prepared for finishing
Painting the model involved several stages, first a rub down with a fine Scotch pad, then a dip in Horolene clock cleaner, very effective if smelly, followed by a two part etch primer, also smelly.
After the etch primer had cured a grey Halfords primer was followed by two coats of Humbrol acrylic spray paint.
Under the Bonnet

Under the bonnet
Battery packs, radio gear and self resetting trip switch are strapped to an aluminium plate inclined to allow it all to fit under the bonnet. The radio gear is from Timpdon Electronics, a 433 MHz rather than a 2.4GHz system, hence the slightly longer aerial wire routed into the cab space. Power switch, and a charging socket disguised as a brake wheel, are fitted to the cab front.
An easy and rewarding model to build, it was also very good practice, and all without a single etched panel in sight. The model runs extremely well and is as powerful as my steam loco, in fact it is well over the top with wheel spin limiting its pulling ability in spite of the 1.8kg weight.
One issue is with gear wear: it is horrendous and I am looking into alternatives, ideally alternatives that do not include a worm-drive.