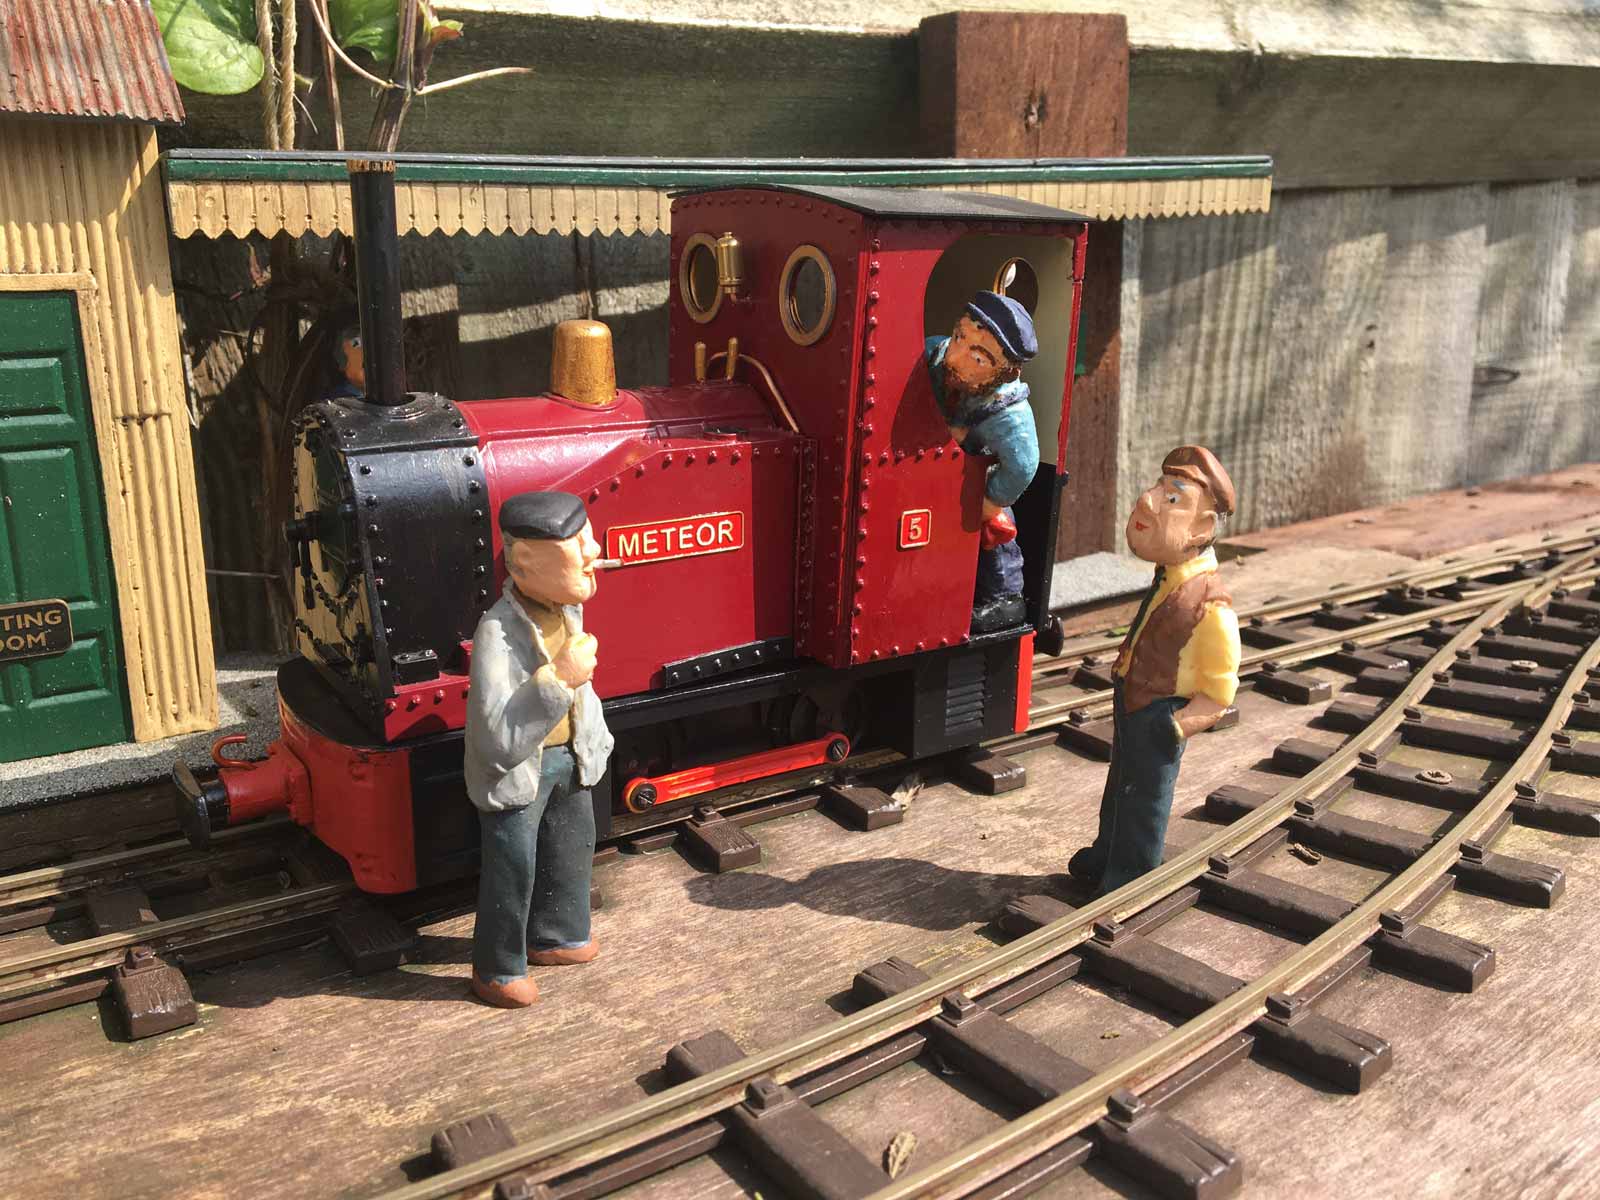
By Mark Hirst
You know how it is, you are sat idling away 10 mins, whilst the PVA is drying on your latest model, looking at eBay and suddenly something grabs your attention
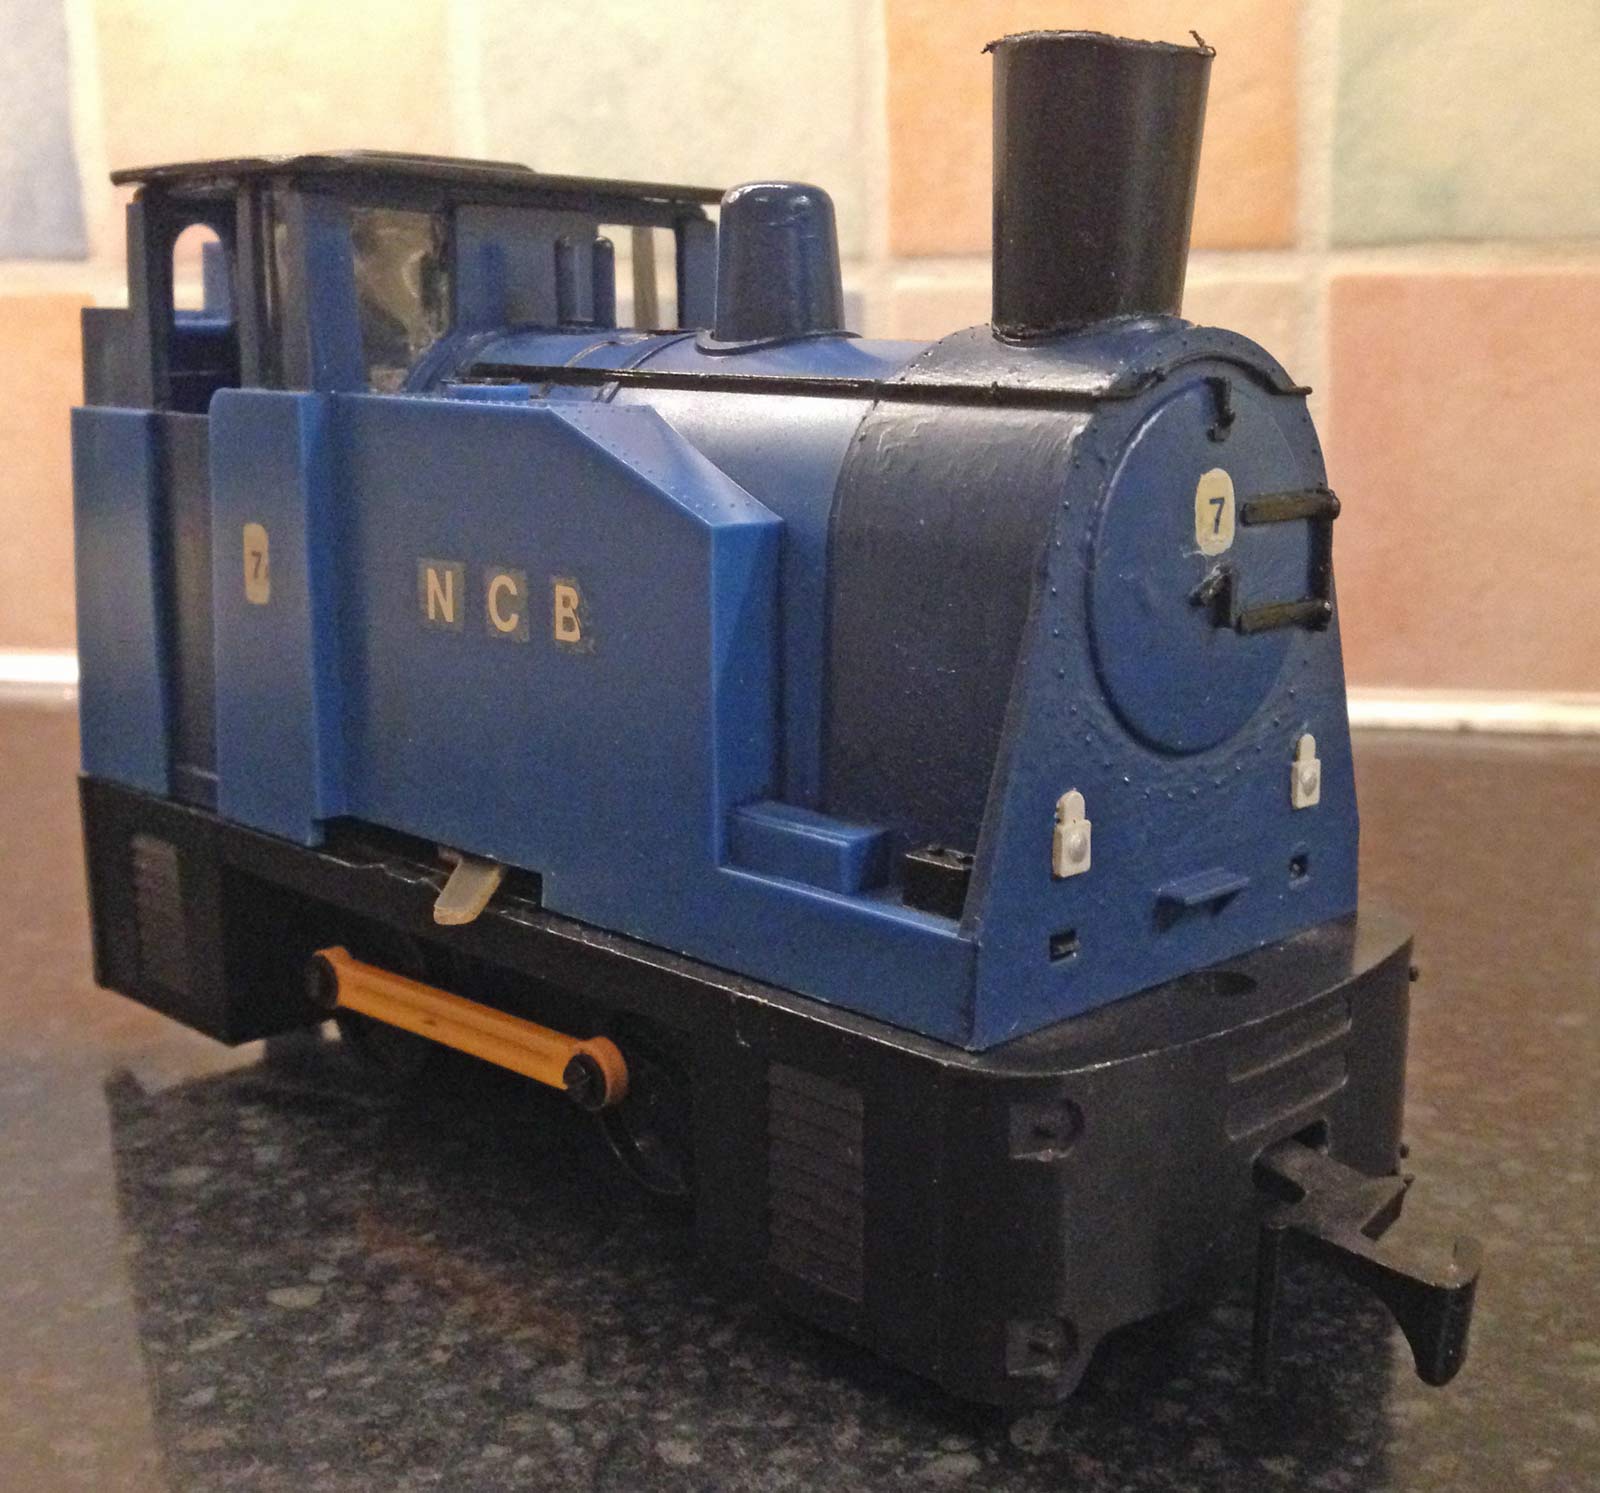
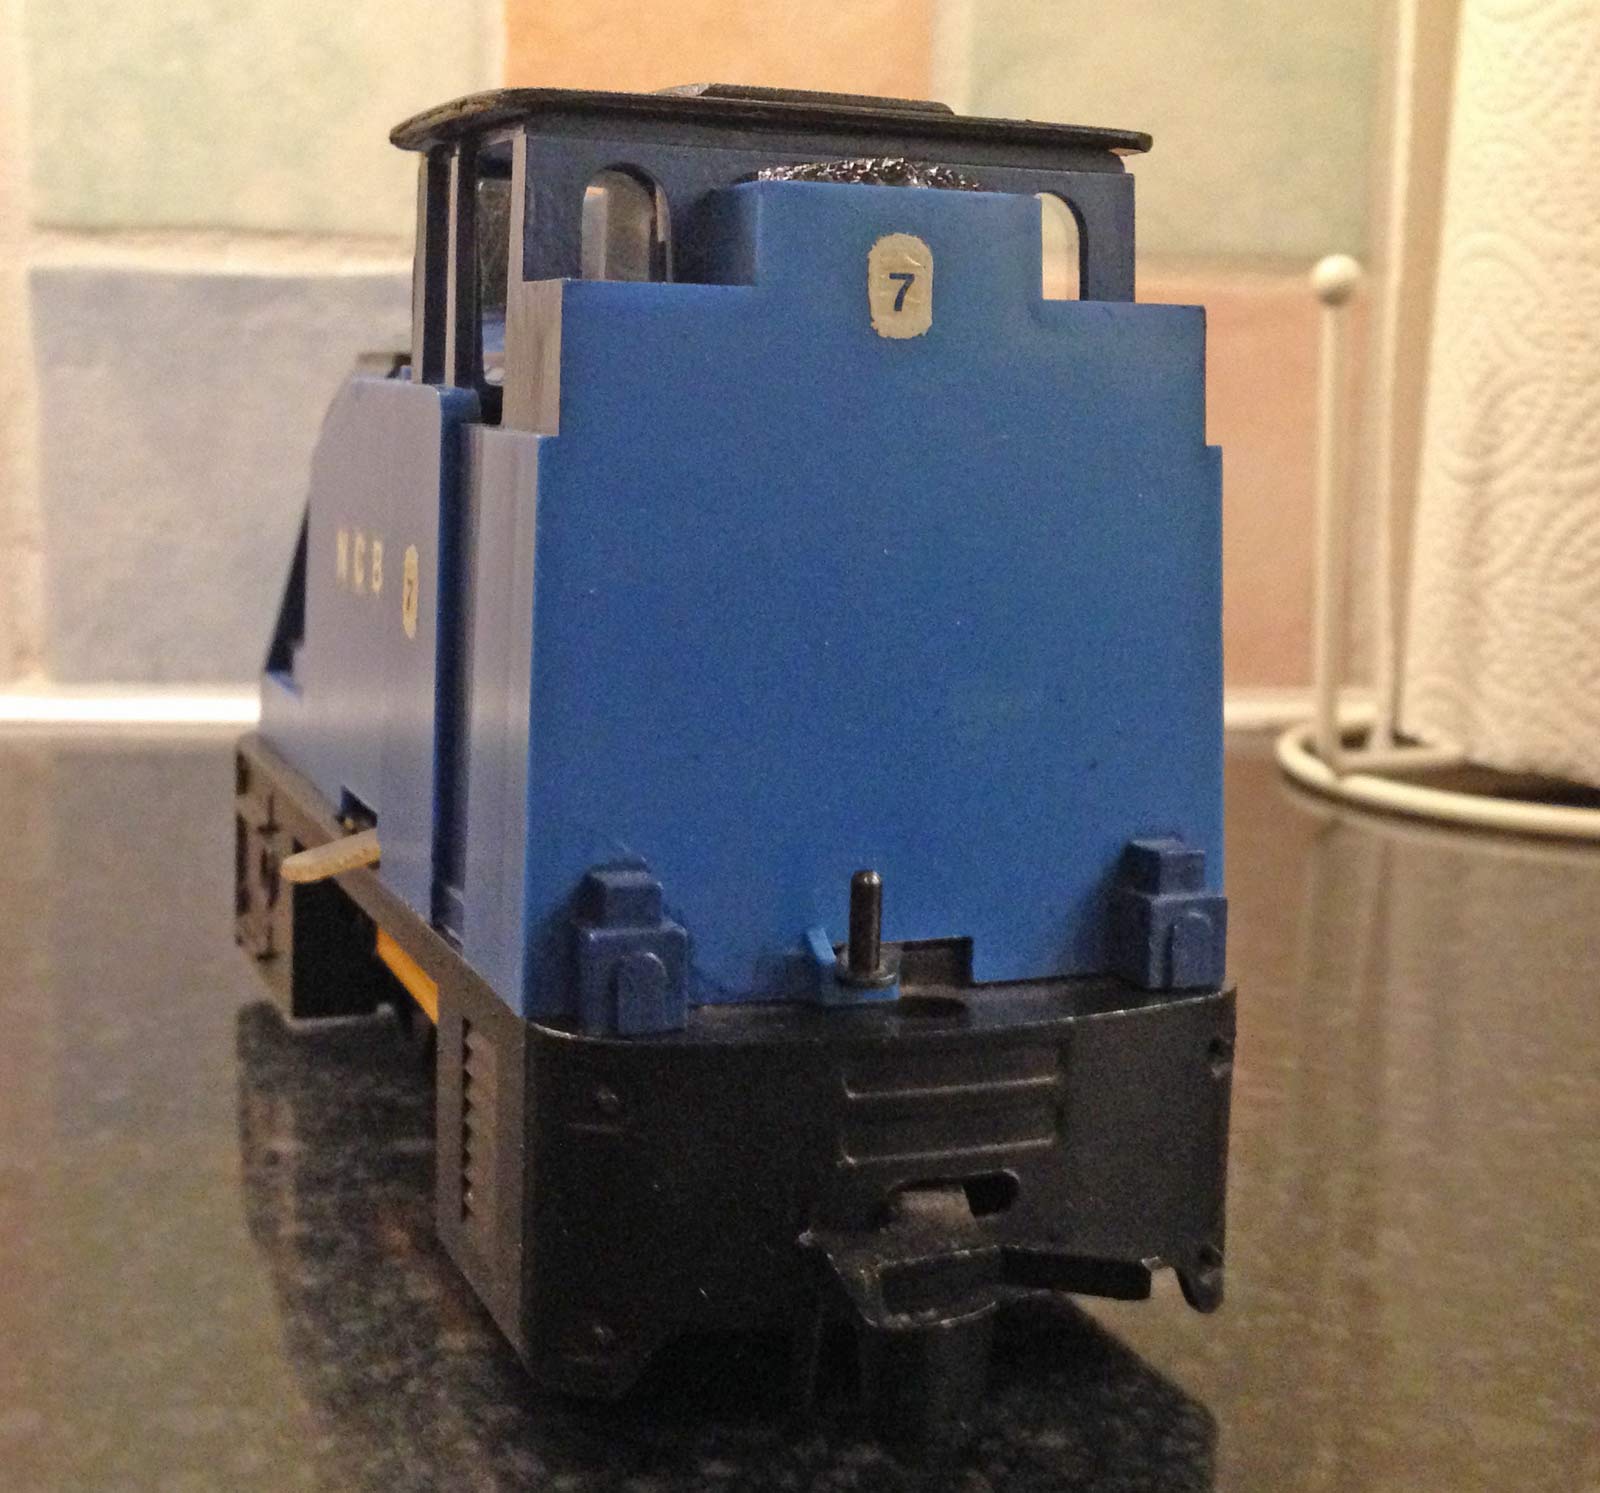
A few months ago I spotted this little fella – a Big Big Steam Outline O gauge that had been altered into a NCB Pit Loco.
-
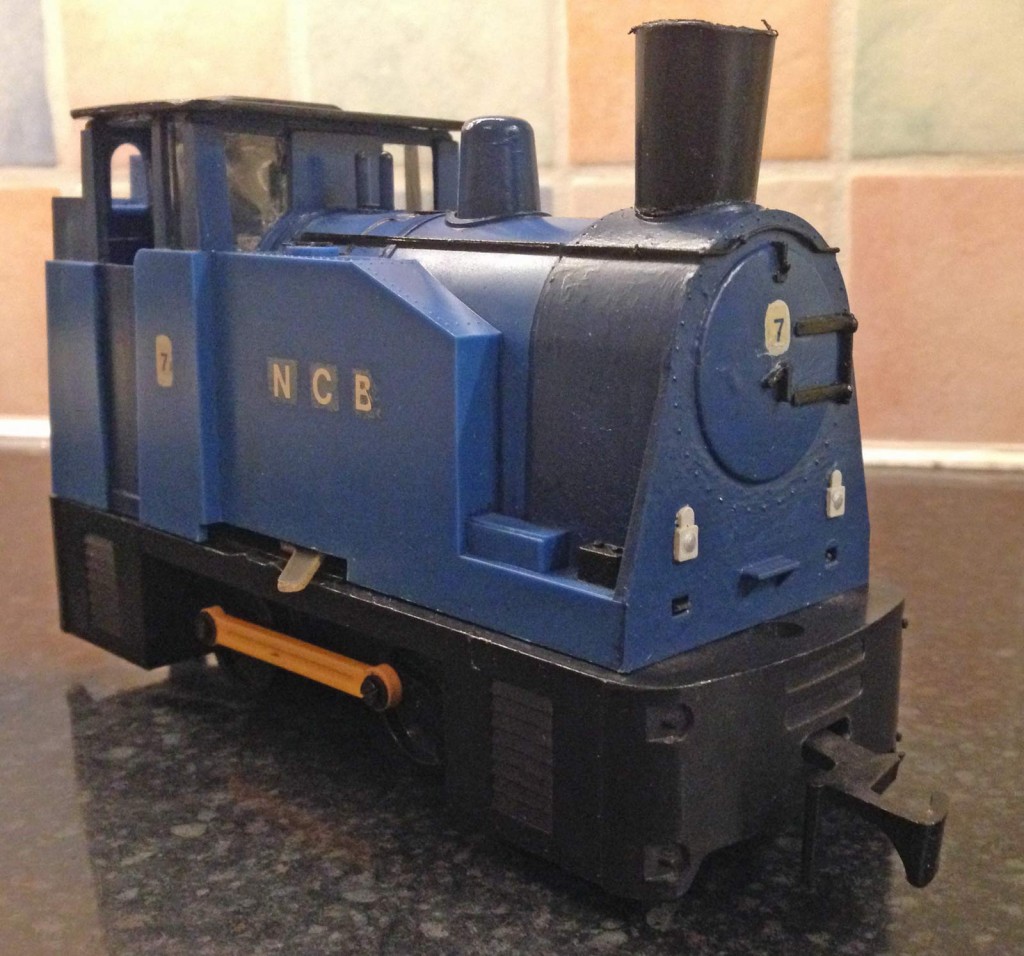
- The loco as purchased
-
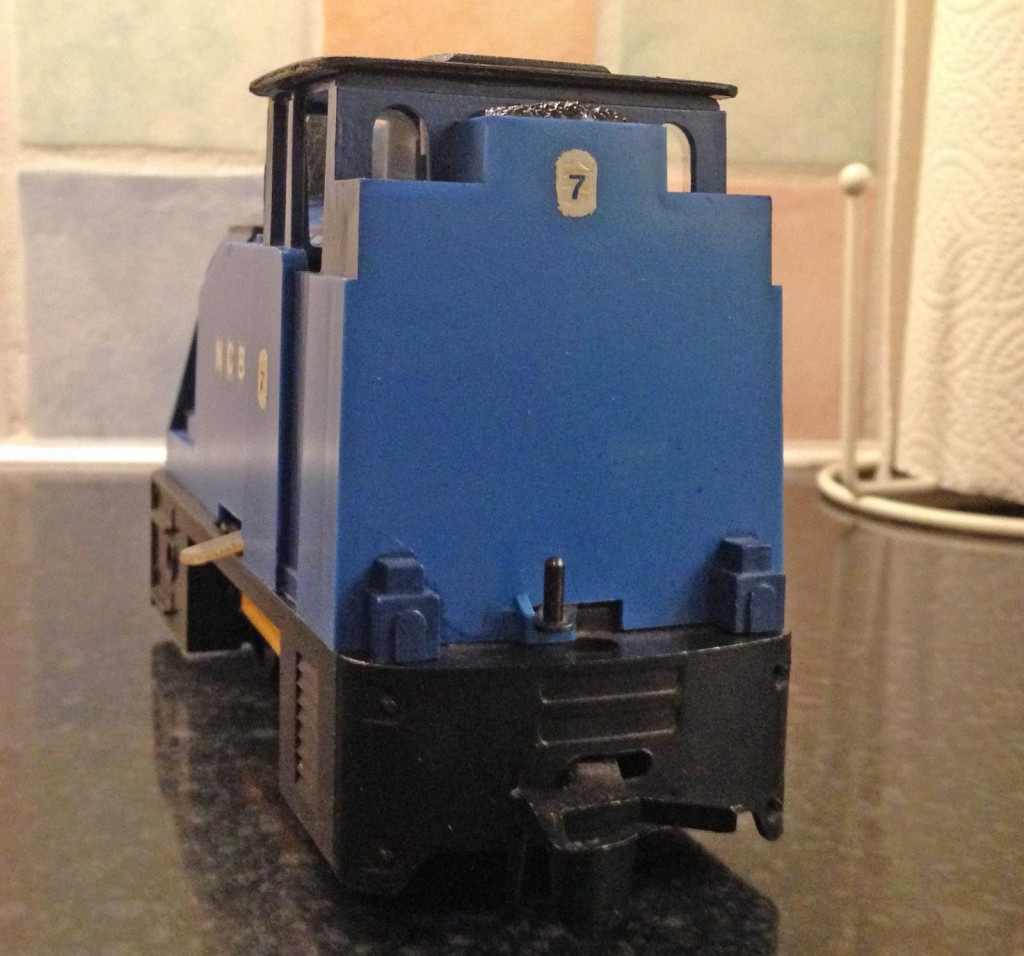
- The loco as purchased
I’d been fancying doing a bit of kit/model bashing to develop a couple of steam outline battery locos to supplement my fleet at the Castle Hill Light Railway, and here was the opportunity. I made a bid and 5 days later it was mine!
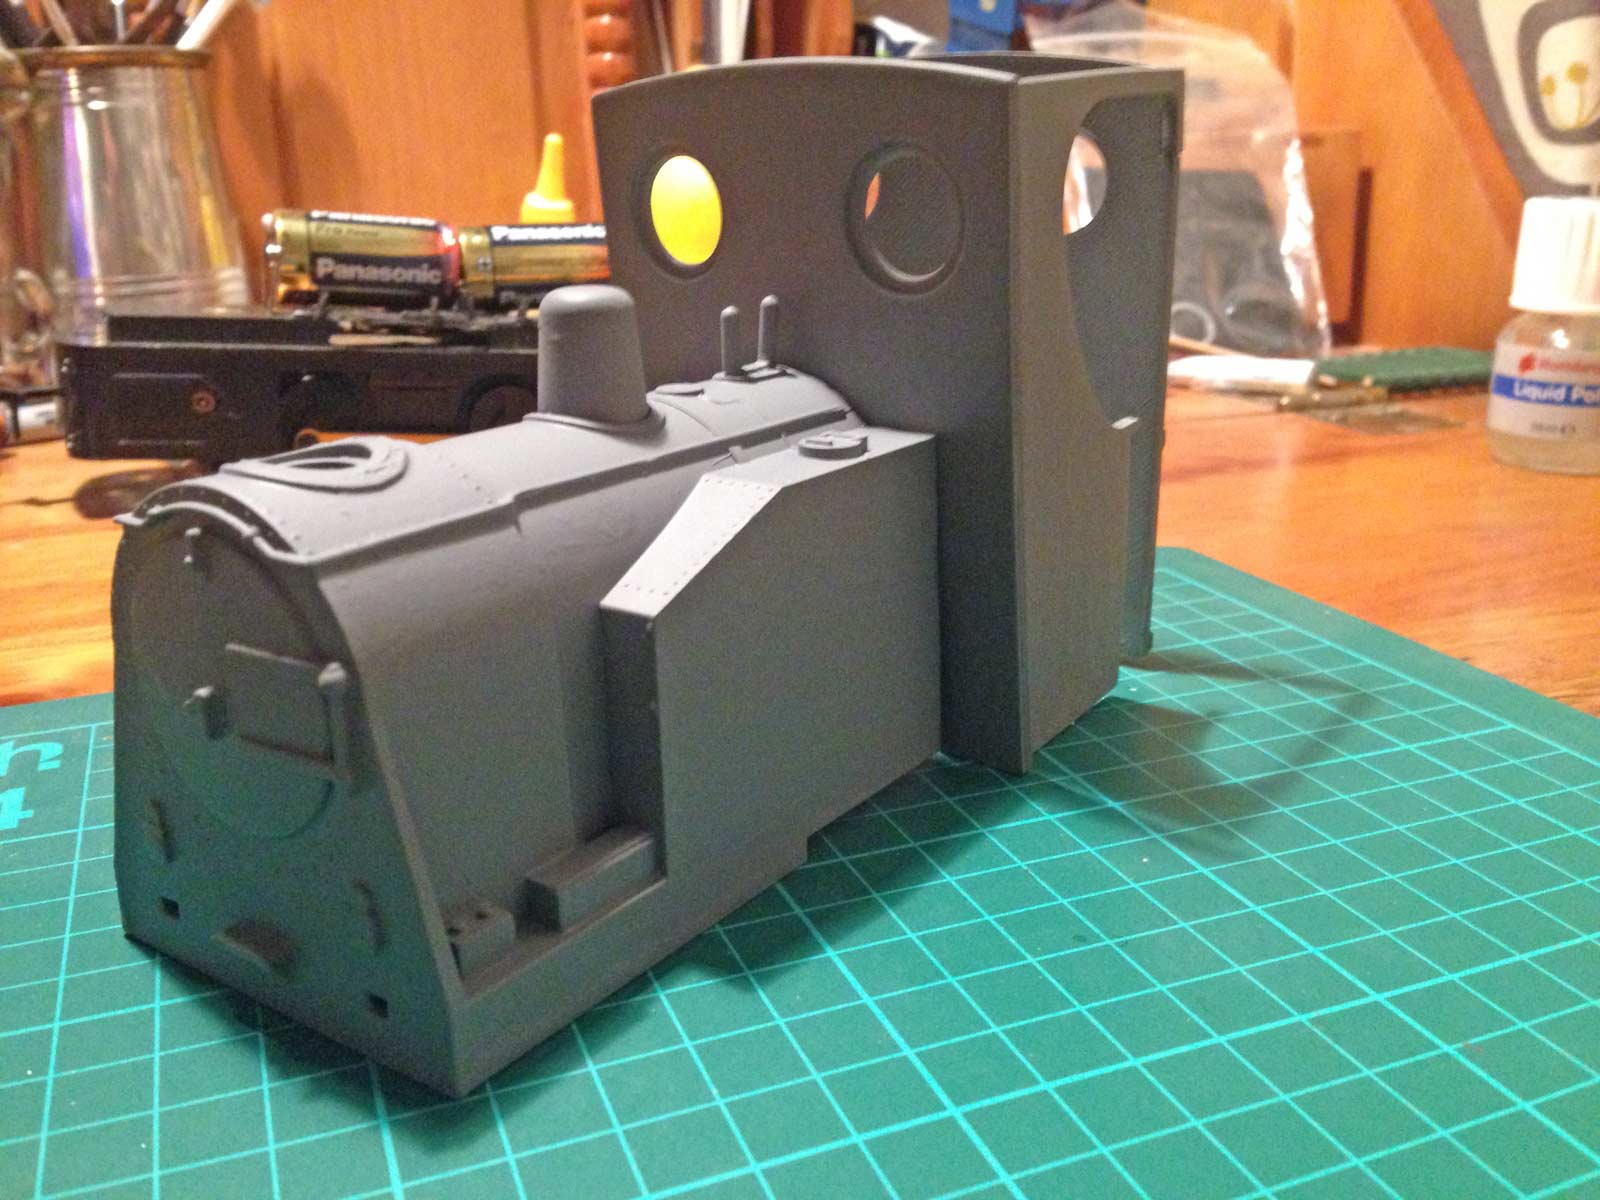
In terms of plans, all I knew was that the boiler, smoke box and side tanks could be made use of at 19:1, but the cab needed to go.
First step was to get to the core body part, so off came the cab lid & chimney:-
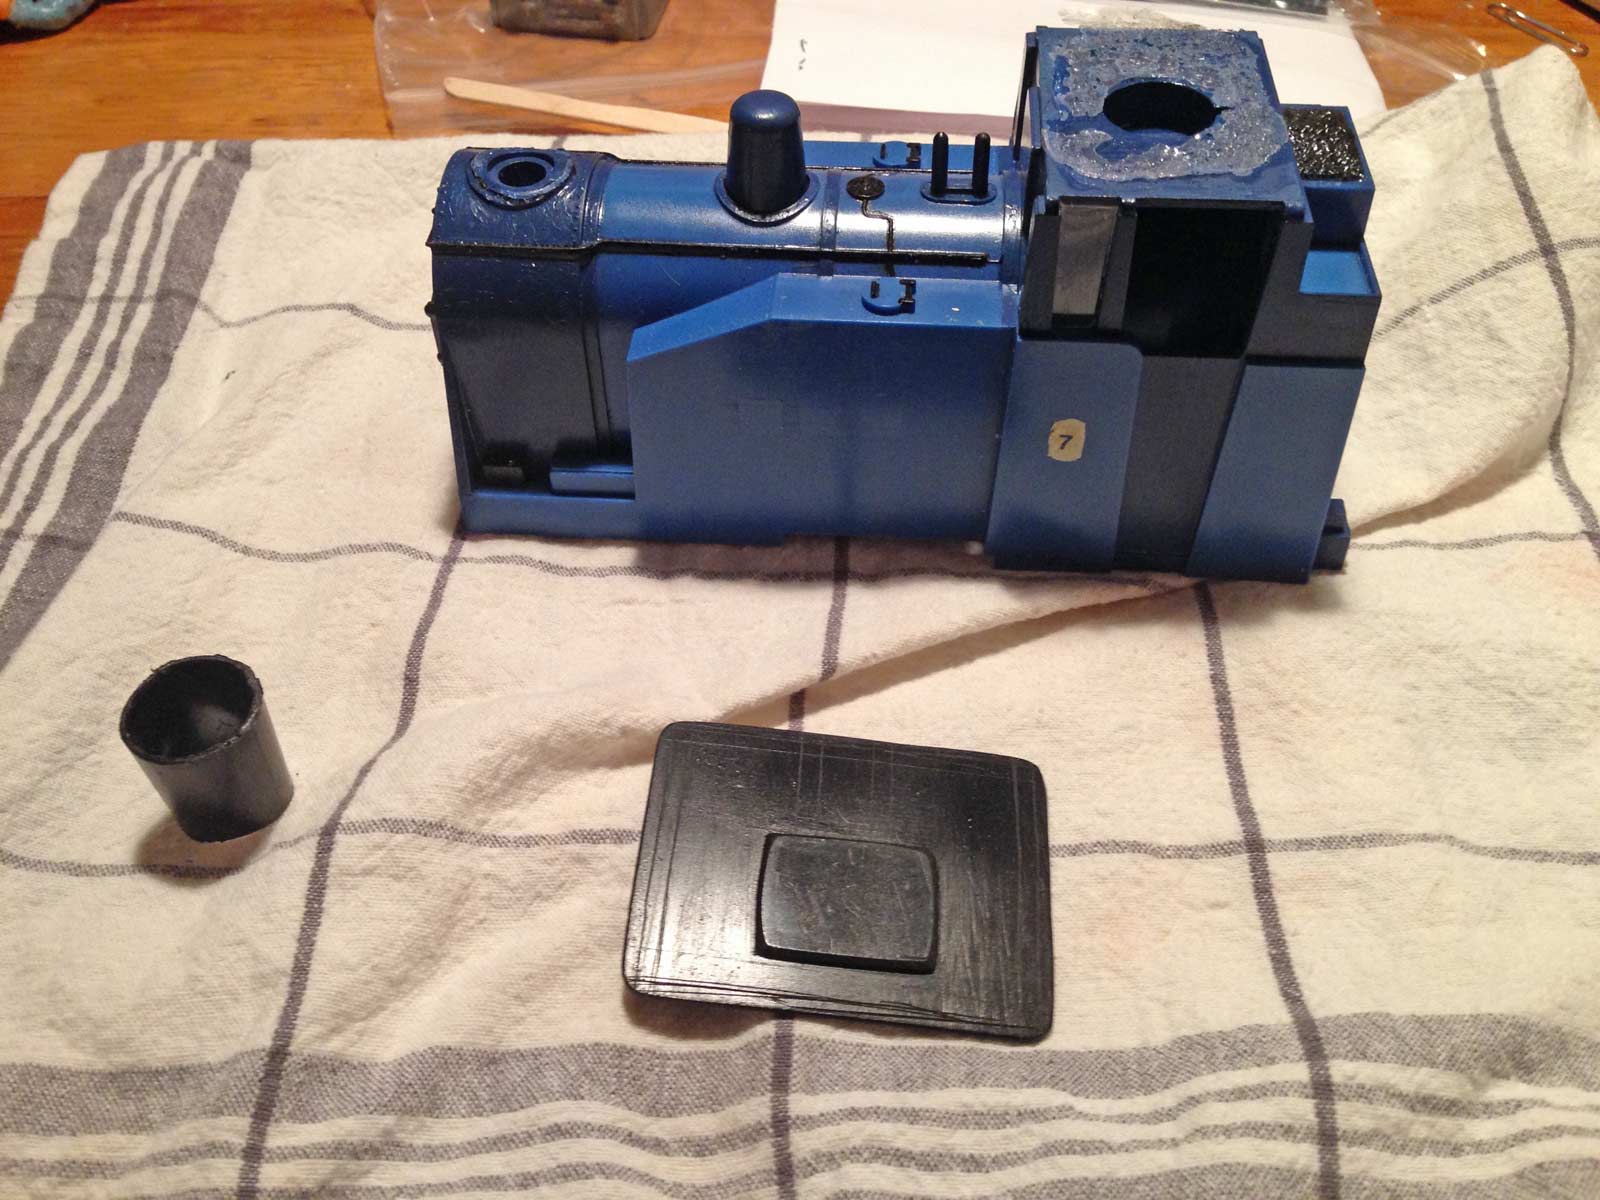
The main body moulding
Then the main cut!
Main moulding cut!
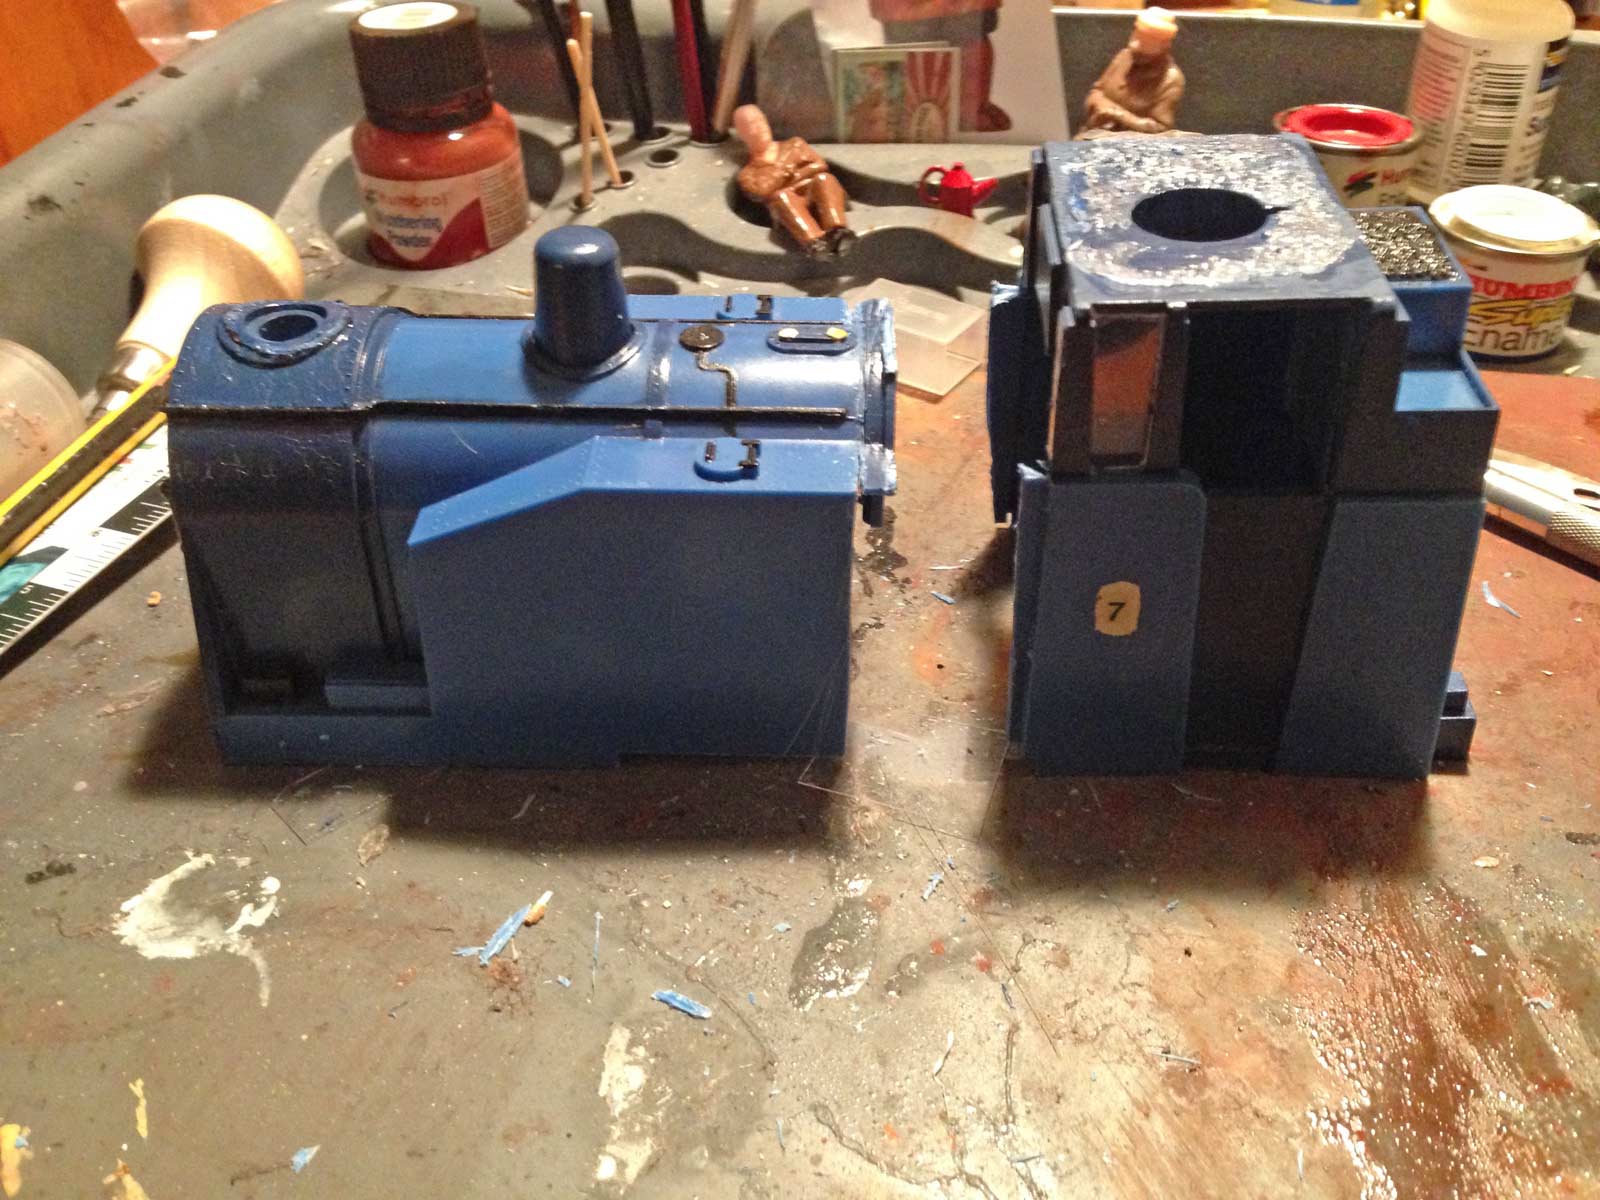
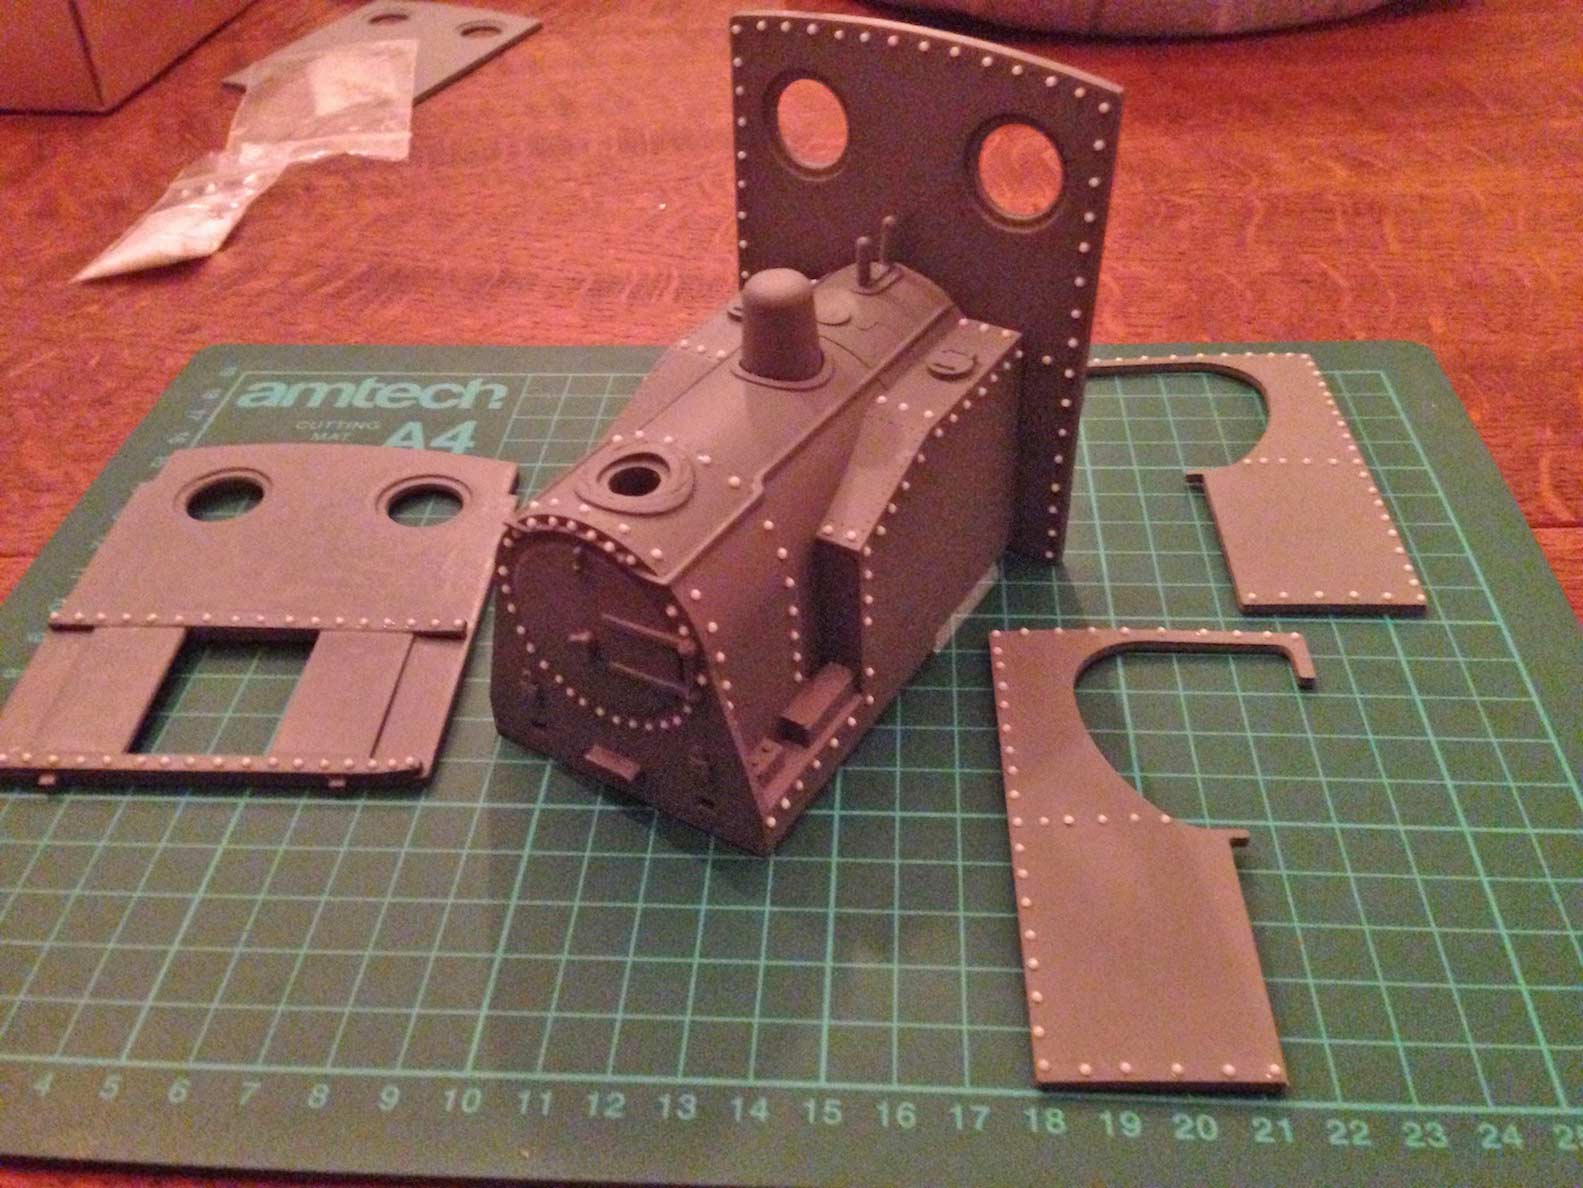
I had in my spares box a PDF Models Hunslet cab that I’d picked up on eBay a while ago to have a go at prepping 3D printed material – perfect, here was an opportunity to try out those skills and add the cab I needed to this build.
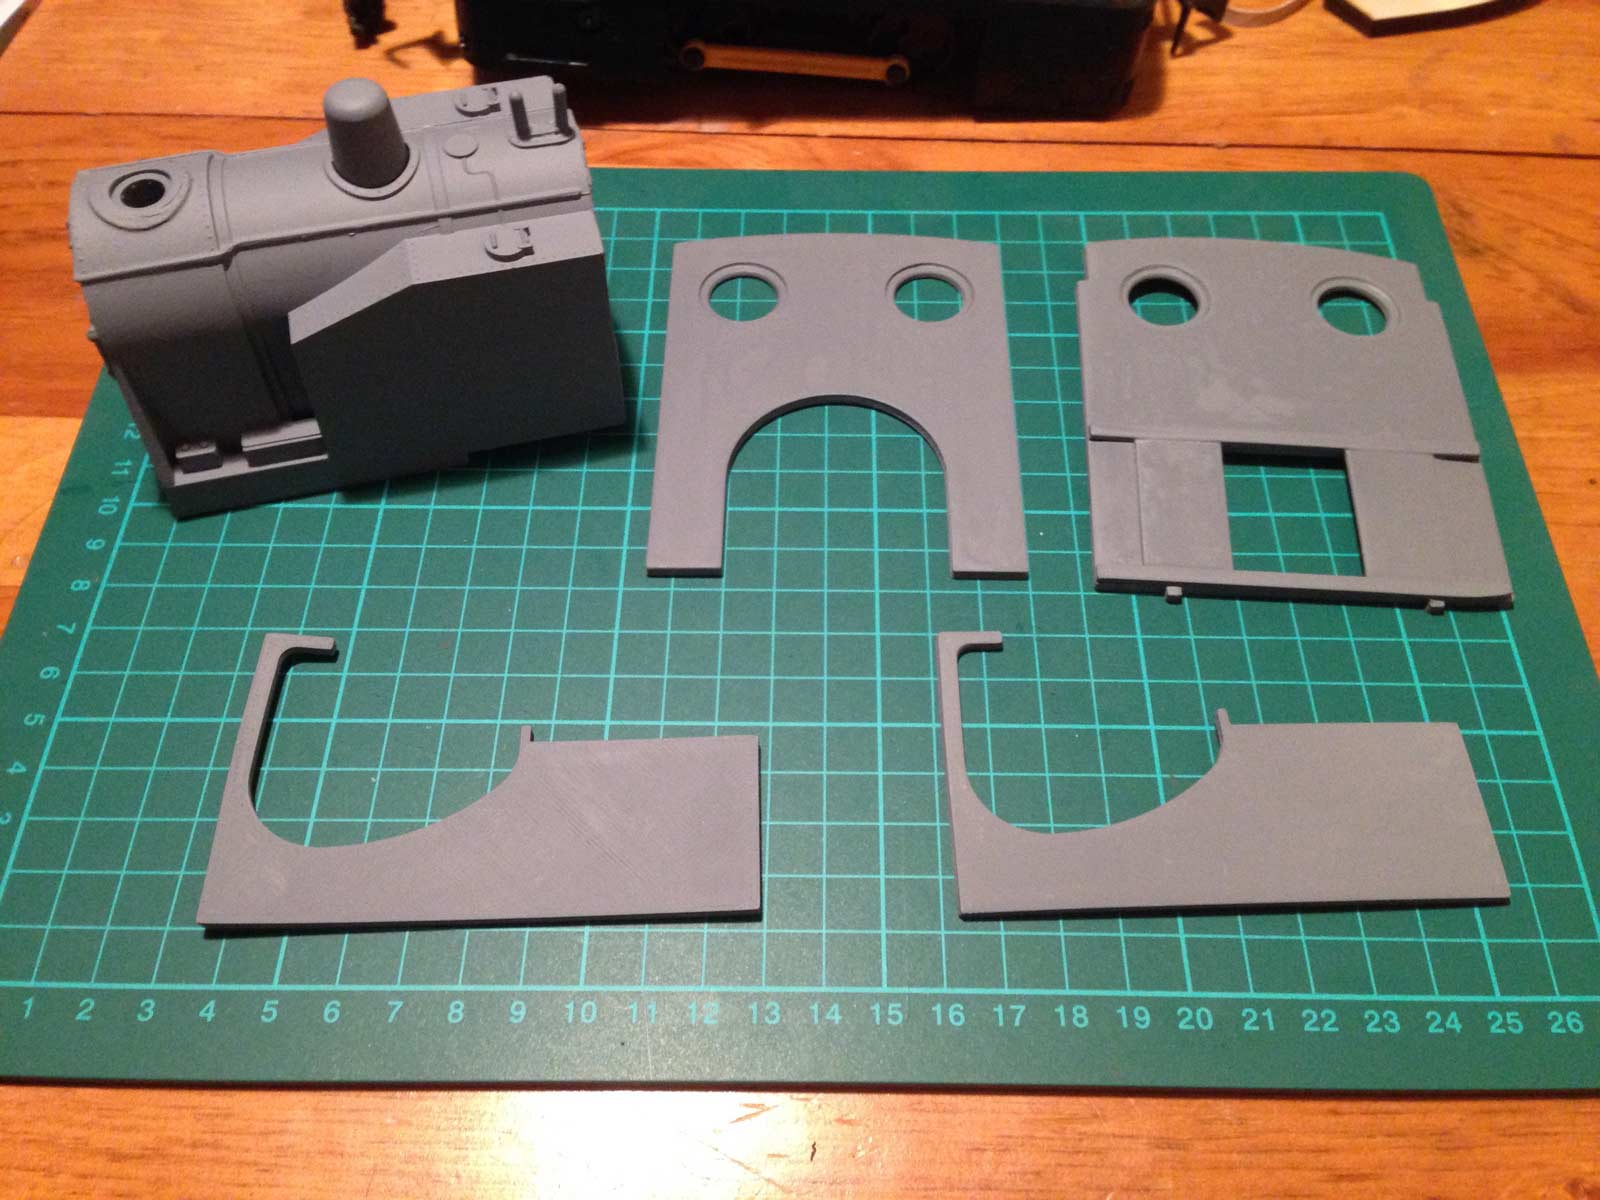
So out came the wet and dry sandpaper to work on the 3D printed cab – I also used the coating XTC 3D which really saved time by creating a new surface above the ridges on the 3D print – this removes about 80-90% of the work usually required and I’ll be using it again with other models – it also worked well on a few deep scratches on the tank side of the boiler section. I coated the tank sides with XTC 3D then when dry sanded them down, then all body parts were given a couple of coats of primer.
Body parts primed
At this point I couldn’t resist a quick mock up – things were starting to come together.
Mock up of the body
To help the loco enter the 19:1 world, I decided to get the whole model riveted up and bring the old and new parts together – for this model I tried out the 1mm nail art dots that can be obtained on eBay (1000 for £1)
Riveting
The loco was then painted up – I decided to paint each section separately, as using gloss rattle cans, I find the flatter you can keep each piece, the better results you get. As this was winter time for the final coats, I had to get the shed (and rattle can) nice and warm to get the shine. Here we are part way through – note the new chimney which started life as a ball point pen!
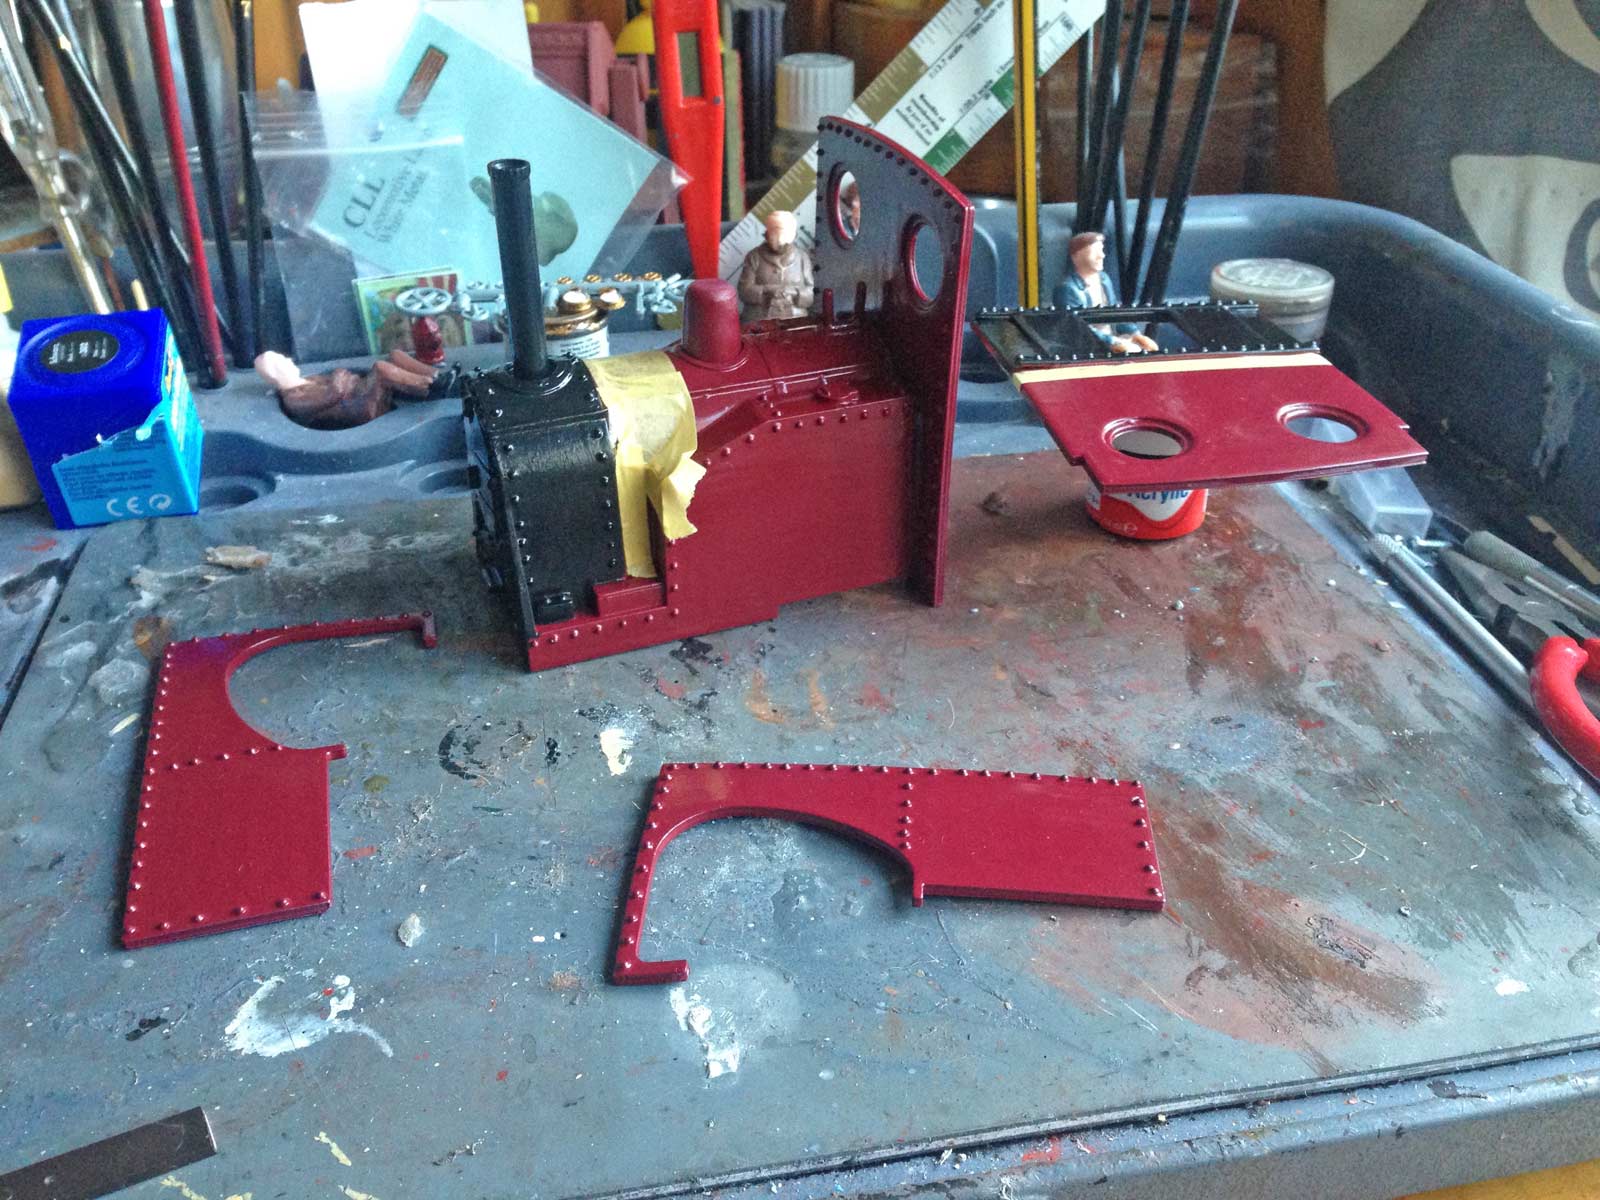
Painting underway
Now to the chassis – I’m not the greatest wiring/soldering person so I started by thinking I’d just paint the rods and we’d be OK. However, in view of how well the body was progressing, I decided to get stuck in and remove the Big Big battery & power switch set up and move to a solution that could be used easily as a manual operation but could easily be converted to RC down the line. So after lots of support and advice from my fellow Garden Rail Forum members, here are a couple of before and after pics to show what I did:-
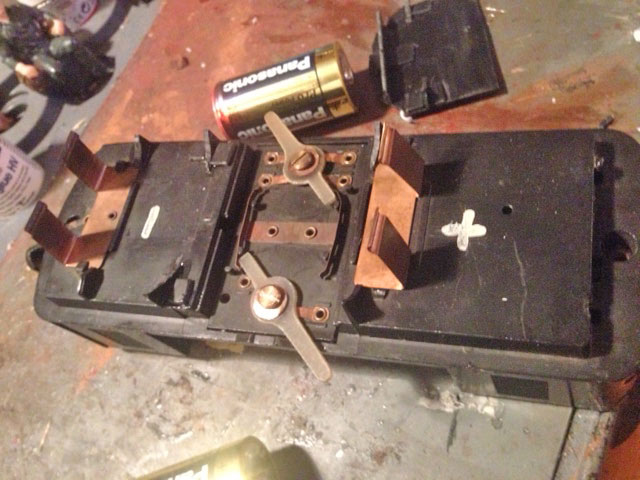
Chassis – before
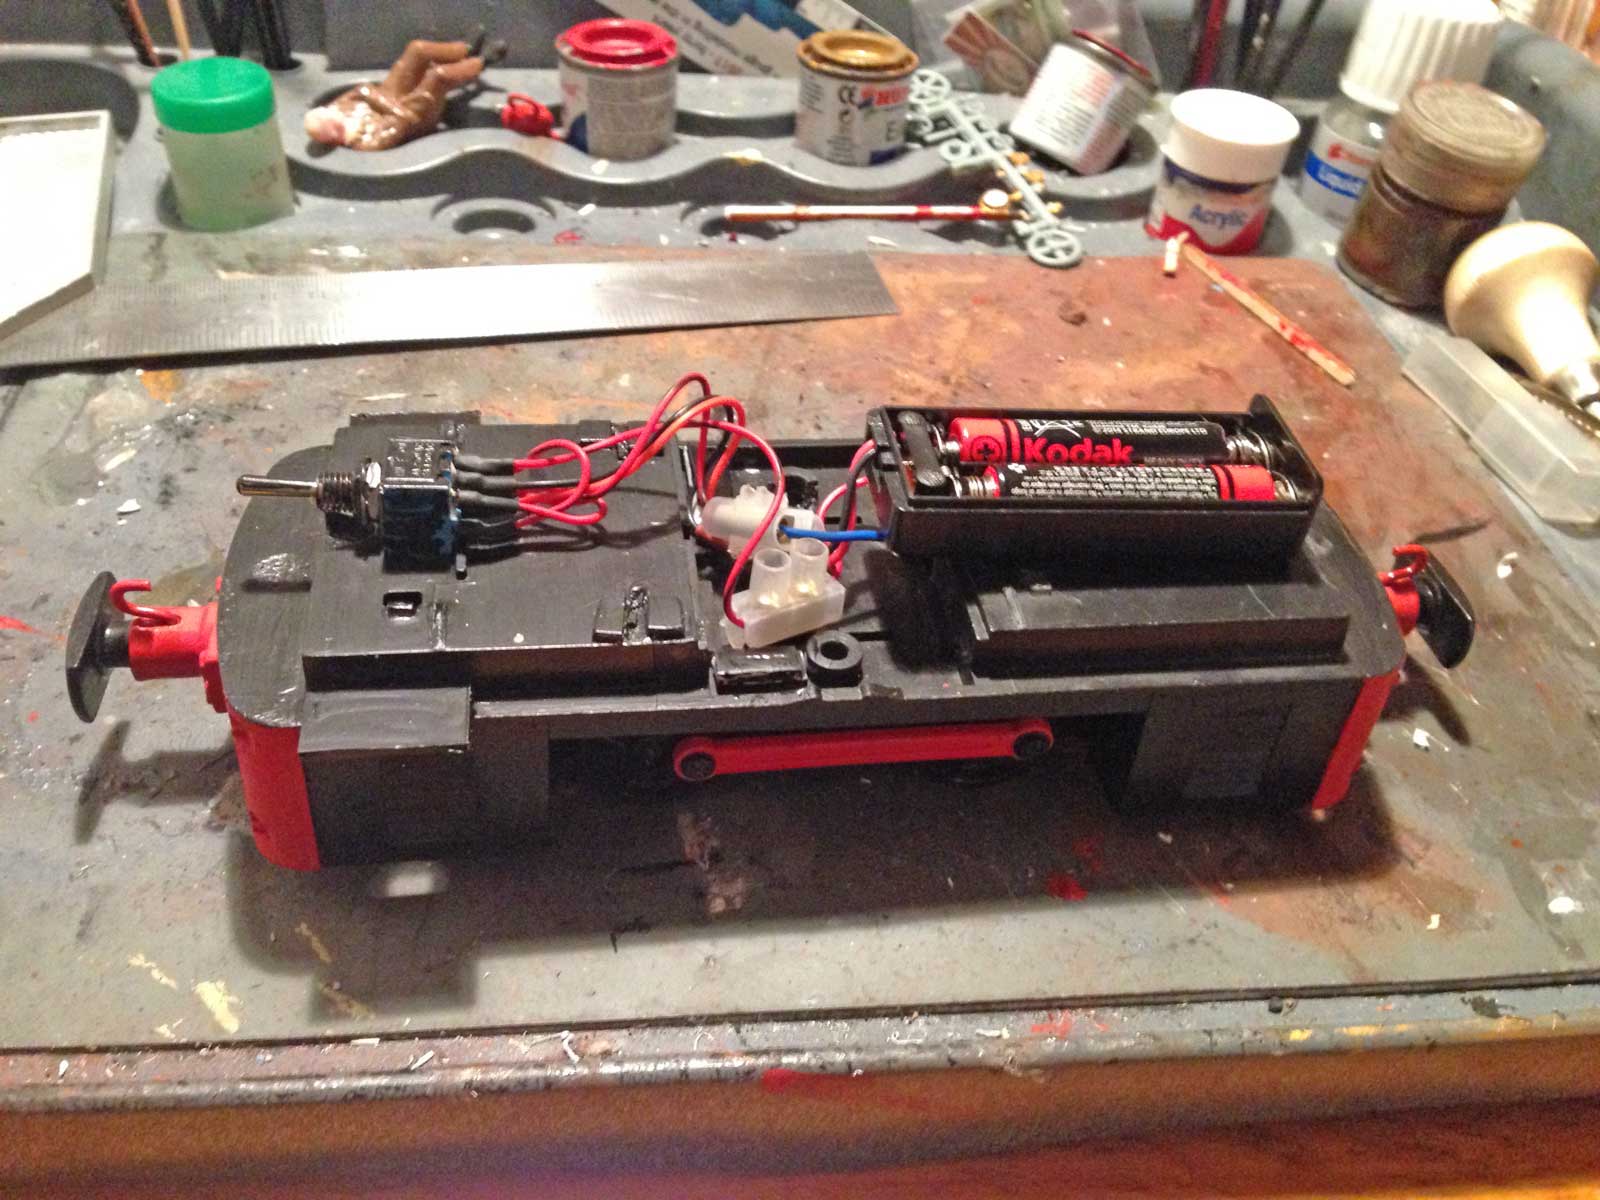
Chassis – after
Then it was time to test the chassis with its new power unit – all seemed OK on tests, but the loco had a huge sideways wobble. After some more testing and advice from forum members, I found that two of the wheels at some point had been taken off and when put back on, they had not been fastened properly, leading to the wobbling and wheel slippage because of the power transfer of the rods. So the chassis was stripped back and the wheels attached – this improved matters no end.
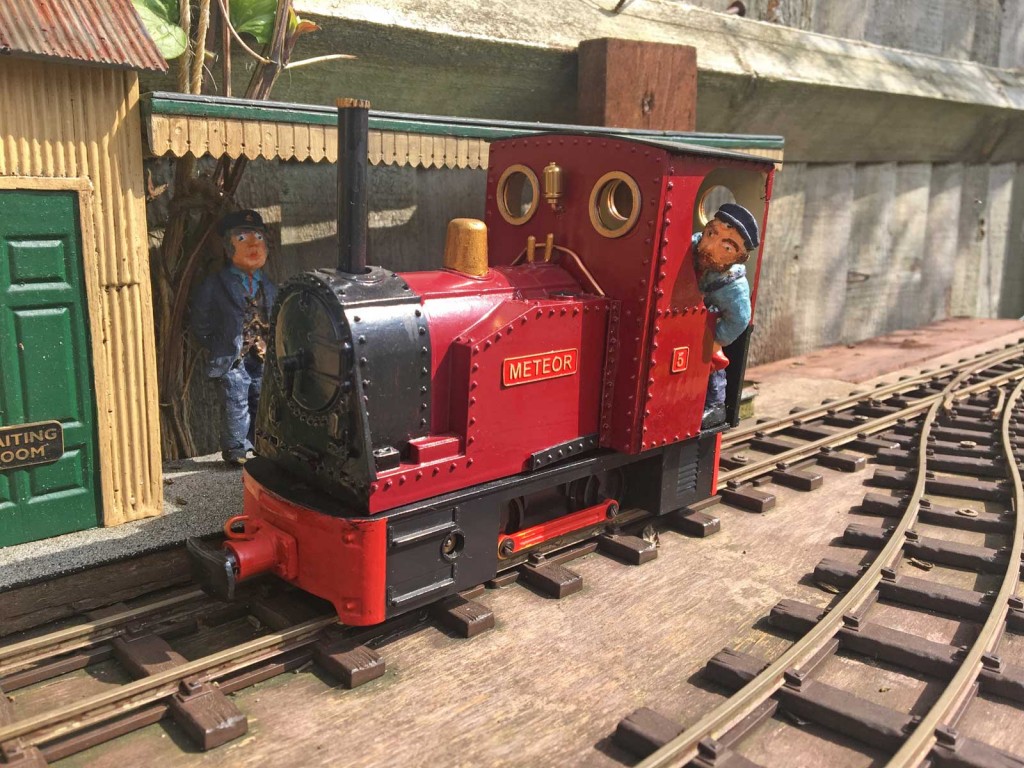
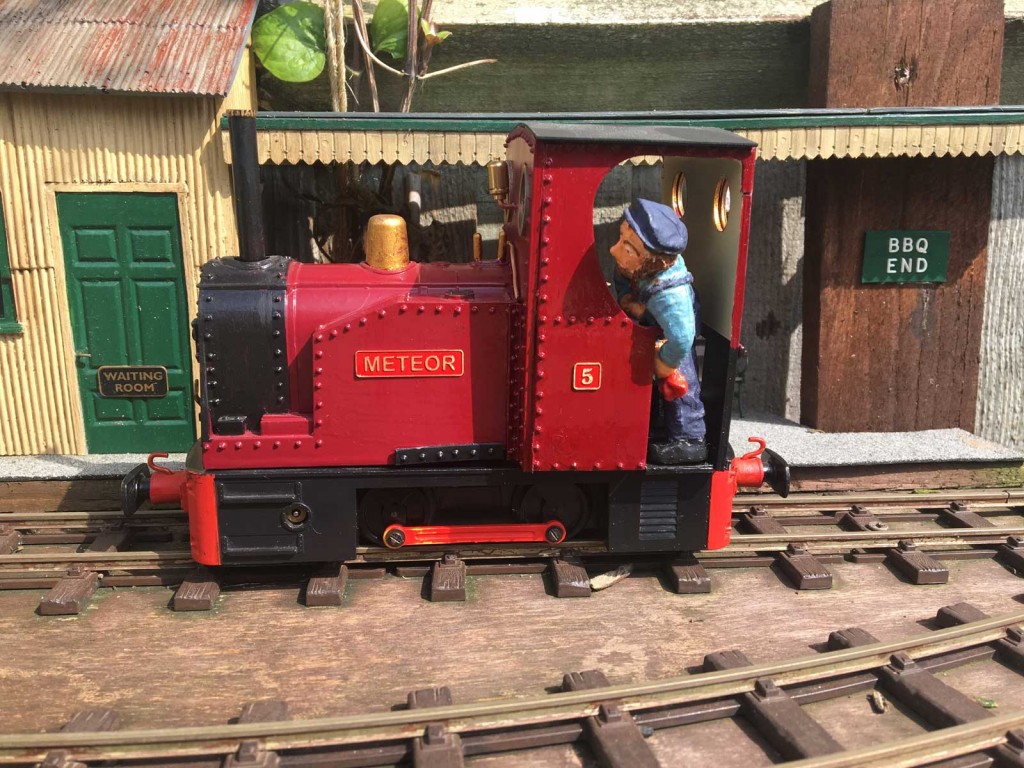
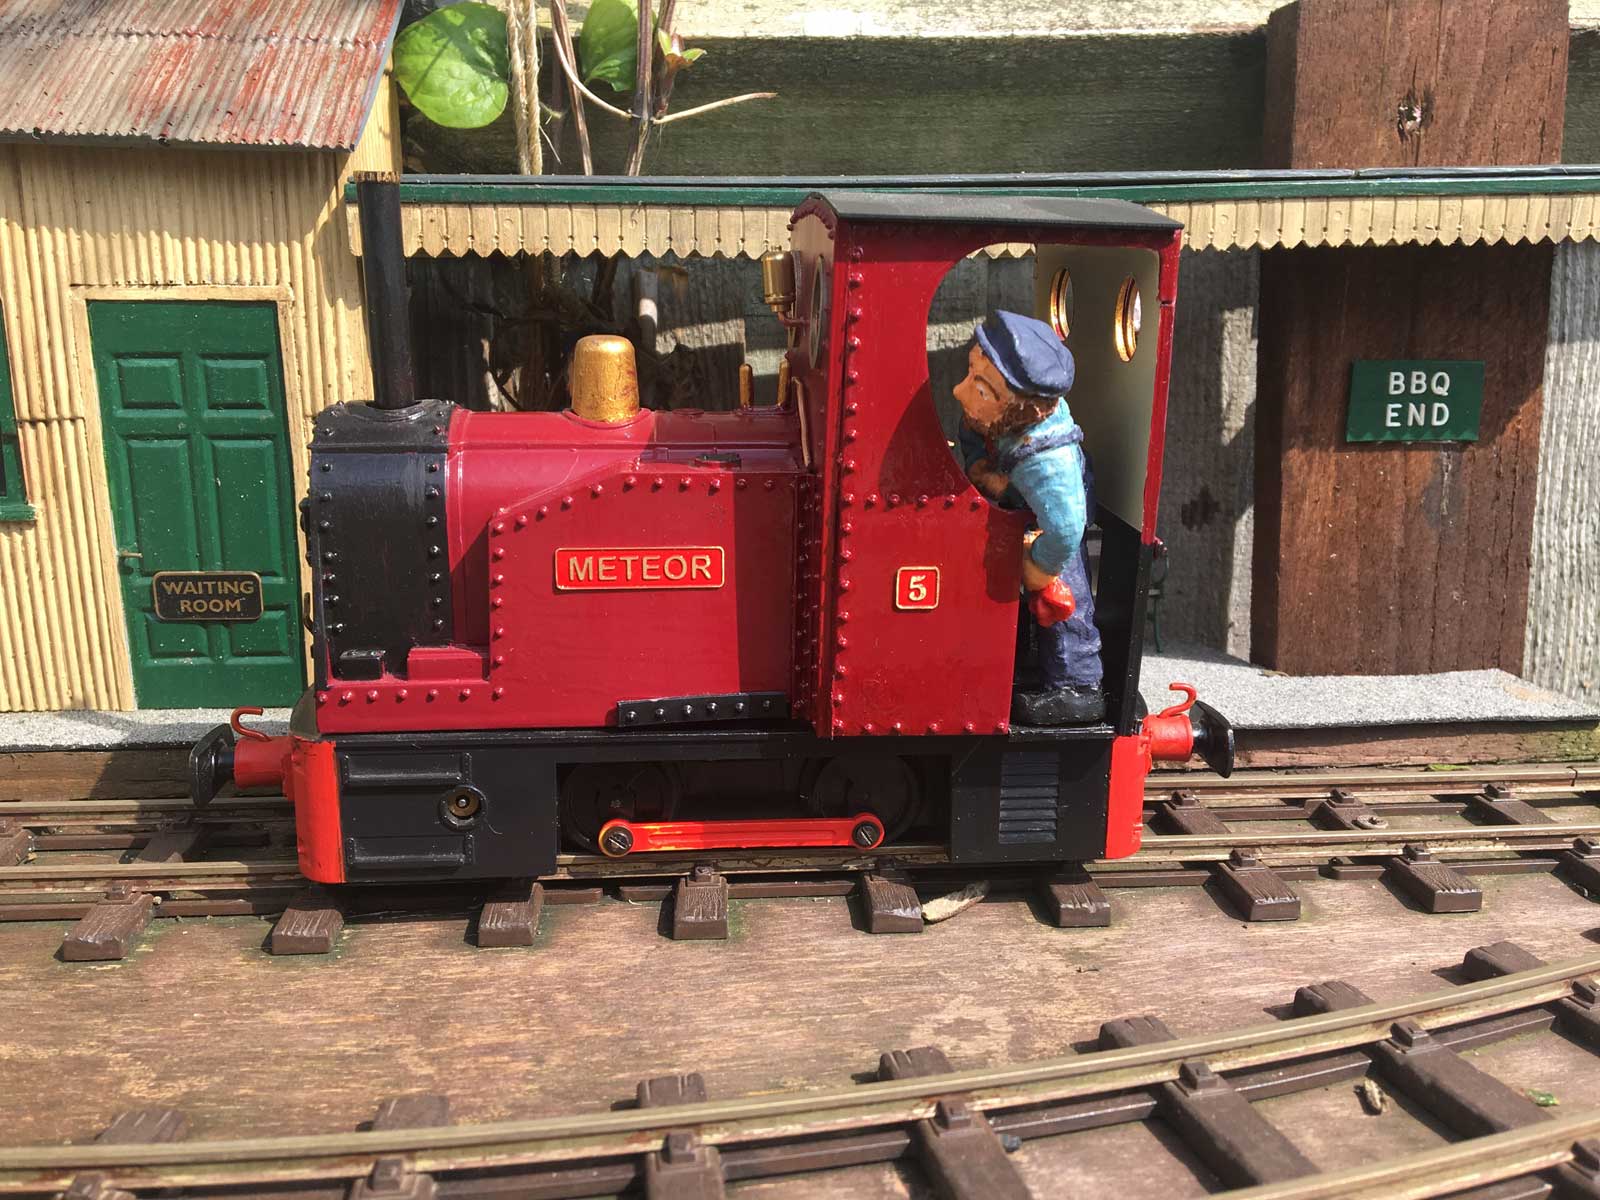
So back in March, after the arrival of name and number plates from the excellent guys at Narrow Planet, and a dummy whistle and buffers from Roundhouse, the management of the CHLR had a naming ceremony:-
-
- Naming ceremony

-
- Naming ceremony
And here is a video of the loco in action the same day:-
So in summary, what started as a chance purchase on eBay has become one of the stars of my small rural line. In the coming months I think I will install RC as it will allow me to ‘drive’ the loco more on my undulating line. I also fancy fitting some form of sound to the loco as well.
I’ve really enjoyed my first kit bash and I’m now looking for my next candidate – if you haven’t tried it, go on, give it a go!
Great looking loco with a clear and well documented description of its evolution. Thanks for the idea of using the nail dots for rivets, consider it nicked.
Rik
Great stuff.